

Last week, I blogged about PMs becoming “AI builders.” Step 1 to enable this? Getting your local development environment setup. Note that I have completed this both on Windows and Mac. In 2026, with Powershell + IDEs like VSCode, development in Windows is doable! However, Mac & Linux still reign supreme for development; I recommend the switch for this role if you are on Windows today.
With that, let’s get into it!

1. Setup your keyboard
There are multiple things to address here, especially if you have an external keyboard you’ve been using with Windows.
First, let’s teach you an important Mac keyboard shortcut: cmd + space to pull up search. This is your Windows key equivalent, and yes, it is more annoying that it needs two keystrokes instead of one 😜.
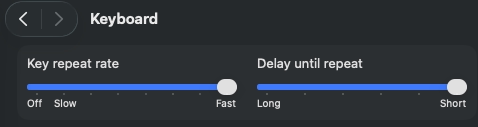
Search keyboard, click on the first link, and start by addressing the painfully slow delete settings when holding down the backspace key in a Google doc or Terminal. Yes, I maxed it, and I can’t believe this is the max speed!
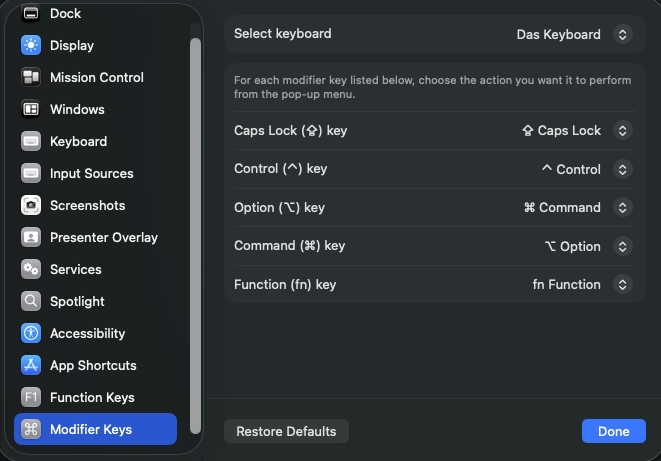
Next, change your modifier keys as necessary for your external keyboard. This is what I did for a Das Keyboard. And no, you can’t just ignore having a control key, as cntrl + c is a necessary operation in terminal/Claude.
2. Make the switch from Windows less painful with hotkeys
Life long Mac users, listen up: snap to side is the best OS feature that you finally got, but Mac doesn’t have keyboard shortcuts for it? For example, windows key + left arrow snaps the window to the left half of the screen. Living without this?

Insert: BetterTouchTool. This tool is so fantastic that a life long license is exactly that; I paid for one >9 years ago when I started at Facebook, and the license still holds!
You’ll notice three other common Windows shortcuts:
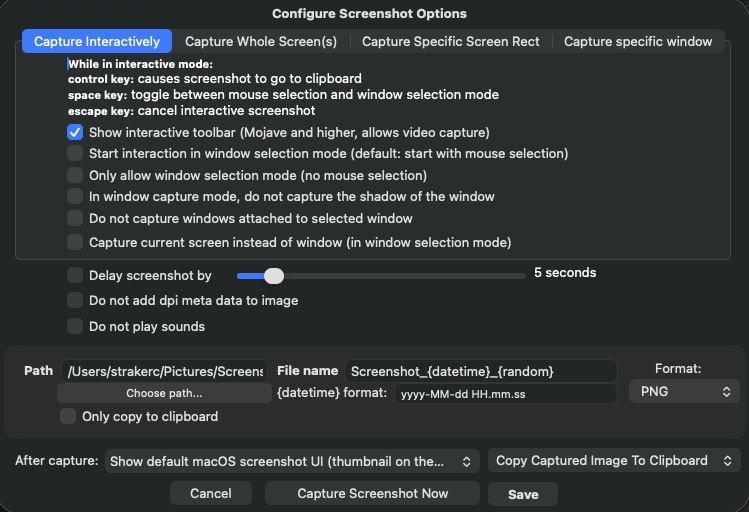
- Windows/Option + S to screenshot (I skipped the Shift part of the Windows shortcut
). This is the setup I use which is slower but highly flexible.
3. Setup your Terminal
Terminal (or PowerShell on Windows) is going to be your new best friend; pin it to your dock. As is though, it’s just so ugly. Let’s fix that with Oh My Zsh. Download and install it. You’ll now have a .zshrc file that you’ll be able to edit, including adding to your PATH here to make it easy to run commands like claude and npm:
The last PATH I haven’t explained yet, but context engineering requires version control and review of prompts/plans that are normally only stored locally in your chat session. OpenSpec is one such solution to this problem (spec-driven development). Get Shit Done is another.
Now is also the perfect time to explain that a good builder is a lazy builder; relish in my laziness:
Shoutout to @markusp; may his trolling never die.
4. Install & setup Claude Code (and IDEs like VS Code and/or Cursor)
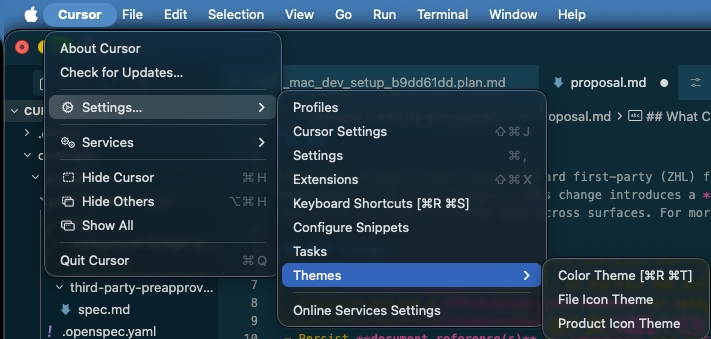
I tried both VS Code and Cursor, and liked Cursor a tad more. Of course, Cursor forked VS Code and charged money for it 🤯. Either way, setup the color scheme as a first step so it is legible for you. In Cursor, you do this here:
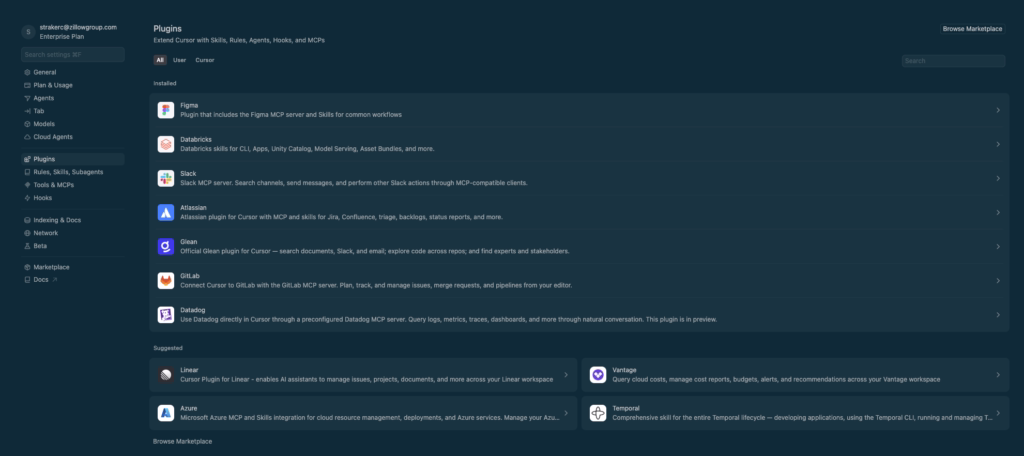
What I love about Cursor is how many plugins they have; go to Settings → Plugins and add all you need to add!
5. SSH & Git access
Git is how you’ll actually pull down a package and build against it, which will likely require an SSH key. Zillow uses GitLab, but whatever your system of choice is, you’ll need to get this setup. See GitLab’s instructions here. Then configure your local git by running the following in your terminal:
6. Setup your Vim
Even with an IDE, you’re going to want your Vim setup (and I’m going to pretend emacs users don’t exist 🤣). Like Oh My ZSH, there are others who have done the hard work for you already like amix/vimrc (the ultimate Vim configuration).
Then, add your own config by running the following:
Mine looks like the following, as NERDTree is life:
(Optional) 7. Setup Claude Cowork
Caude Cowork is local and there is no official migration path documented at the time of this writing. But this process will help you transfer your sessions!
You can then manually recreate projects with the existing context files in the existing folders. Your MCPs should copy over automatically with your account. If this doesn’t copy existing Project markdown files, you can tell Claude what you are doing and it will generate a Zip file for you to copy over as well with all said files.
Thanks Graff Haley for these instructions!
Leave a Comment